
Guest Blogger: Adam Rateliff
Adam: As a National Educator, I get to travel and teach all over the US. I love getting to meet new people and share my passion for all things quilting.
One of the questions longarm shoppers ask is: “Should I wait to get the robotics system?”
My response is always, “Why wait, let the robotics do the hard stuff and then you get to go in and dazzle it up.”
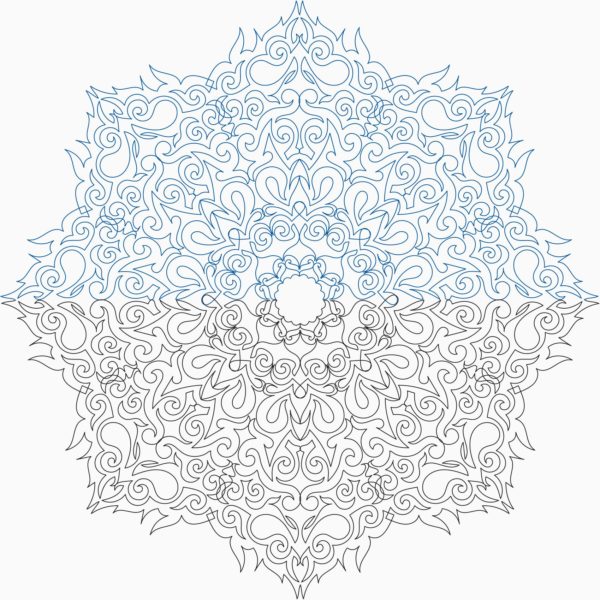
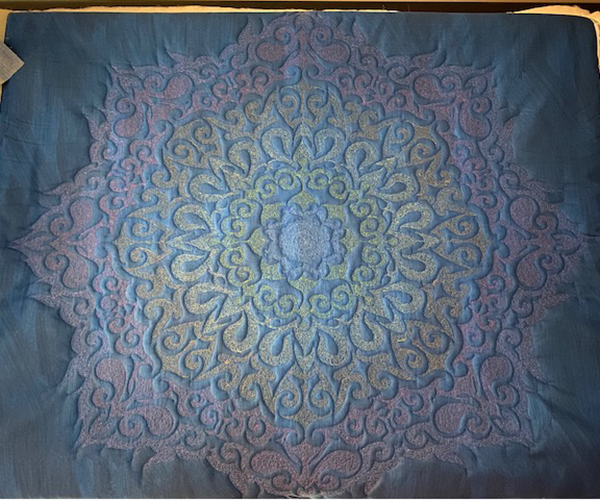
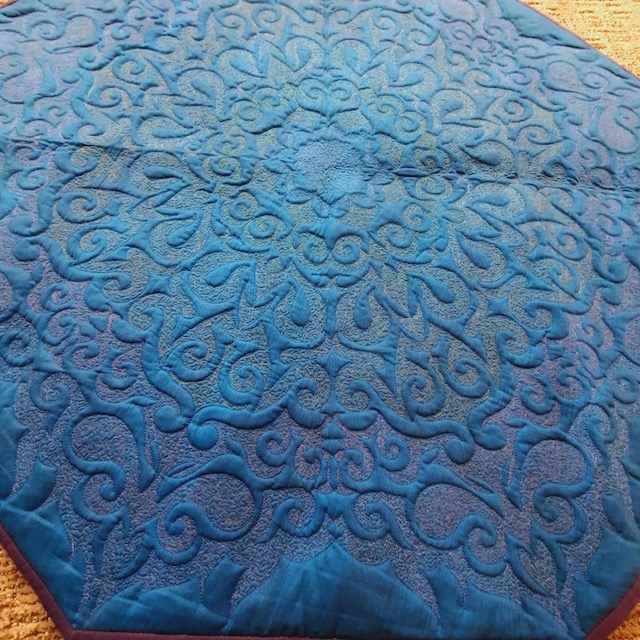
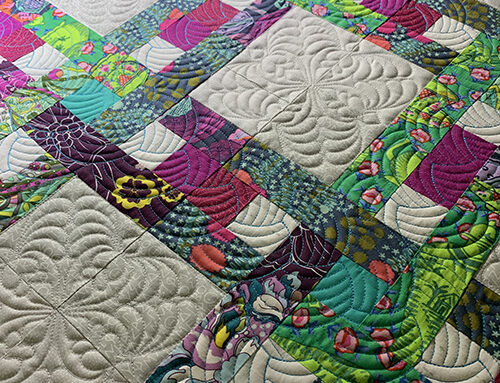
I had that in mind when I created this project. I found this fabulous half-mandala design on ProStitcher.com and decided I would make it as big as I could, while still being able to stitch out in the throat of Taco (the name of my Handi Quilter Infinity 26 with Pro-Stitcher). In my case, the design finishes at 40″ diameter.
You can find more photos of the process on my Facebook and Instagram pages at Adam Sew Fun. I also have some tutorials at Adam Sew Fun on YouTube.
Supplies
The supply list is easy for this project:
- Elaborate Mandala HALF Round by ProStitcher.com
- 1-1/2 yards fabric for the top
- 1-1/2 yards for Backing
- Batting*
I used two layers of batting to give it extra puff. I used a layer of Quilter’s Dream Poly on the bottom with a layer of Quilter’s Dream Puff on top. - Assorted threads*
I used 7 colors of Bottom Line by Superior Threads
Quilting
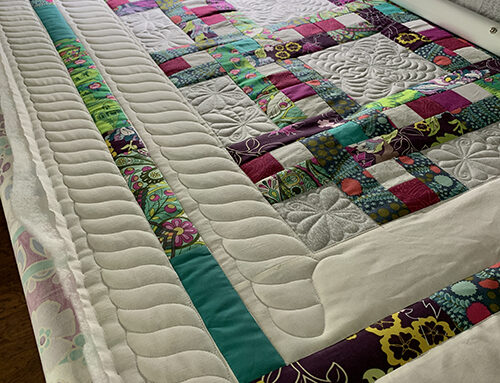
The first step is to piece the back to make it large enough to hold the top. In this case, I didn’t need it huge, but I do like at least 3 inches extra on each side.
Once the backing was created, I was ready to load the quilt onto the frame. Once the top and backing were on, I basted down my top using my method, Basting Down a Wholecloth Quilt, video on Youtube.
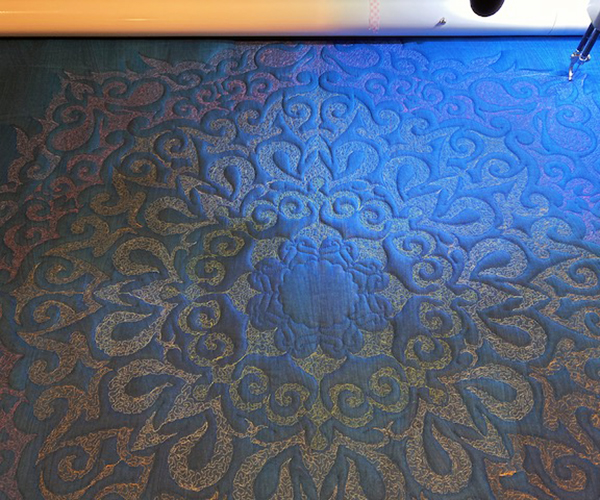
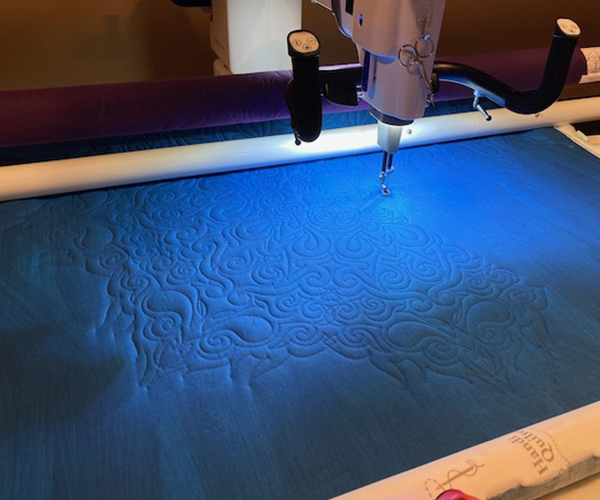
Now that everything was ready to go, I centered my design and had the robotic system stitch out the first half. It was fun to watch the machine work and be inspired. I didn’t have a final plan at this point, I was just stitching out the mandala design.
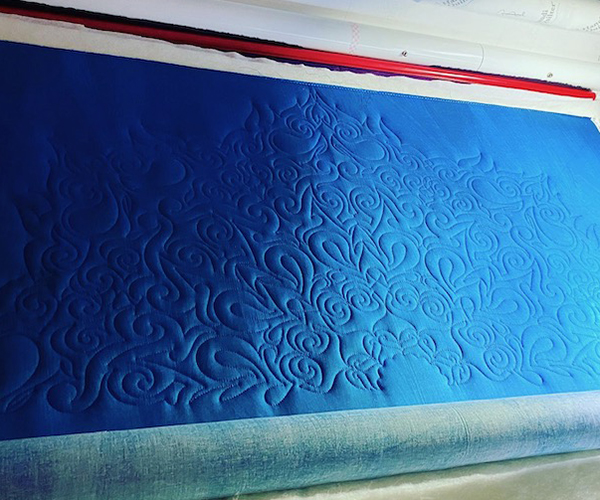
Once the first half was done, I advanced the quilt and started stitching the second half. Take a bit of time to align the design halves; the results are worth it.
Now the top was done and I was already loving it, but I knew I wanted to do some dense stitching to make some of the design pop. I took the printable image of the design in my iPad and started playing around with colors and negative space in the Pro-Create app. (Pictures-> Edit -> Markup will probably work, too.) Once I had the plan below, it was time to choose threads.
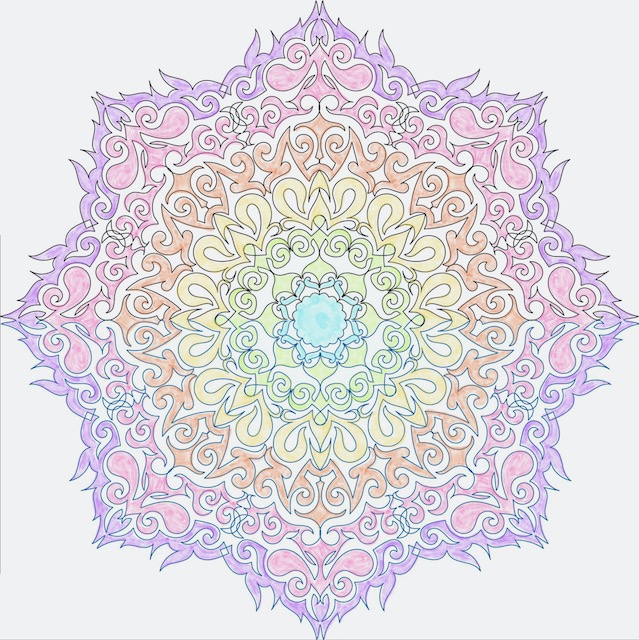
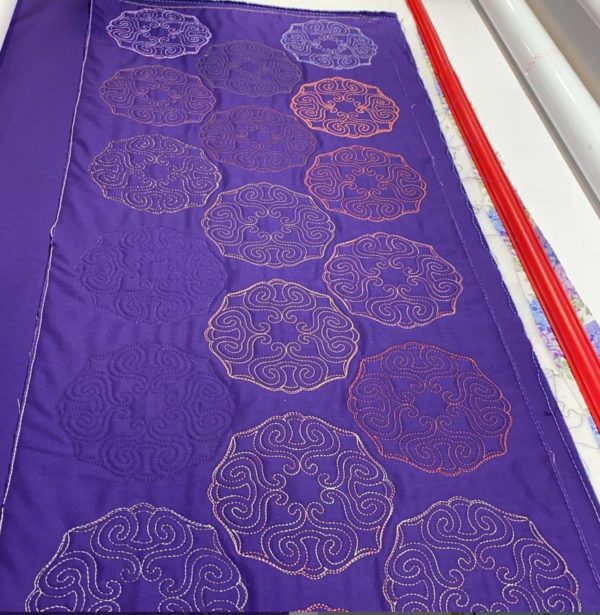
Previously, I stitched a wide thread sample colors and weights to reference. These come in very hand when choosing so many fantastic colors. The sample block stitched is also a ProStitcher.com design, Quarter Square Block 7.
I wanted to see hints of color and not necessarily the thread itself, so I decided to go with The Bottom Line. I have step-by-step videos of creating the thread sample on my YouTube channel.

Working from the outside in, I started my micro quilting. Remember the design is quilted and stabilized so filling in, in any direction, will not cause the fabric to shift.
Each color ring is more satisfying than the last.

This was such a fun process and it was exciting to see it come together with each step.
Thank you for taking the time to go on this journey with me and I hope I might have inspired you to make your own. It was a fun project and your robotic system makes it so easy. If you have any questions, you can always reach me through social media or my webpage AdamSewFun.com
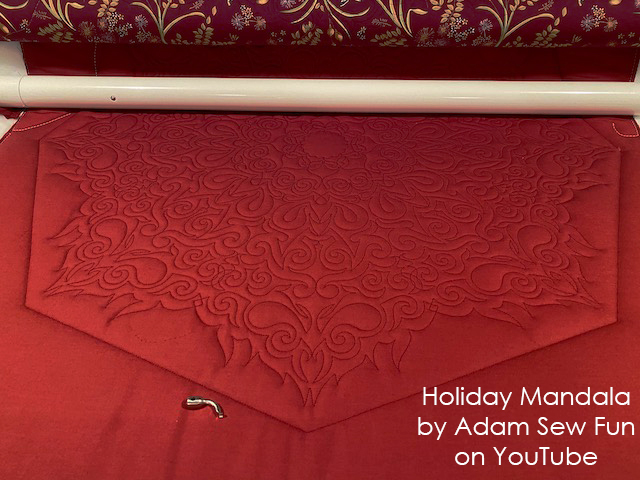
Pro-Stitcher: Thank you for being a guest blogger, Adam! As luck would have it, Adam is releasing a video on how to make this design for the holidays. Watch along on this two-part video as he shows you tips and tricks for using this design with your robotic quilting system.
Adam, that mandala turned out fabulous! I’ve been a little intimidated by these huge designs, but you explained it very well. Not so hard!
Adam This design is amazing. The way you filled it with different colored thread made it incredible.. You’re making me want to do a wholecloth!!